
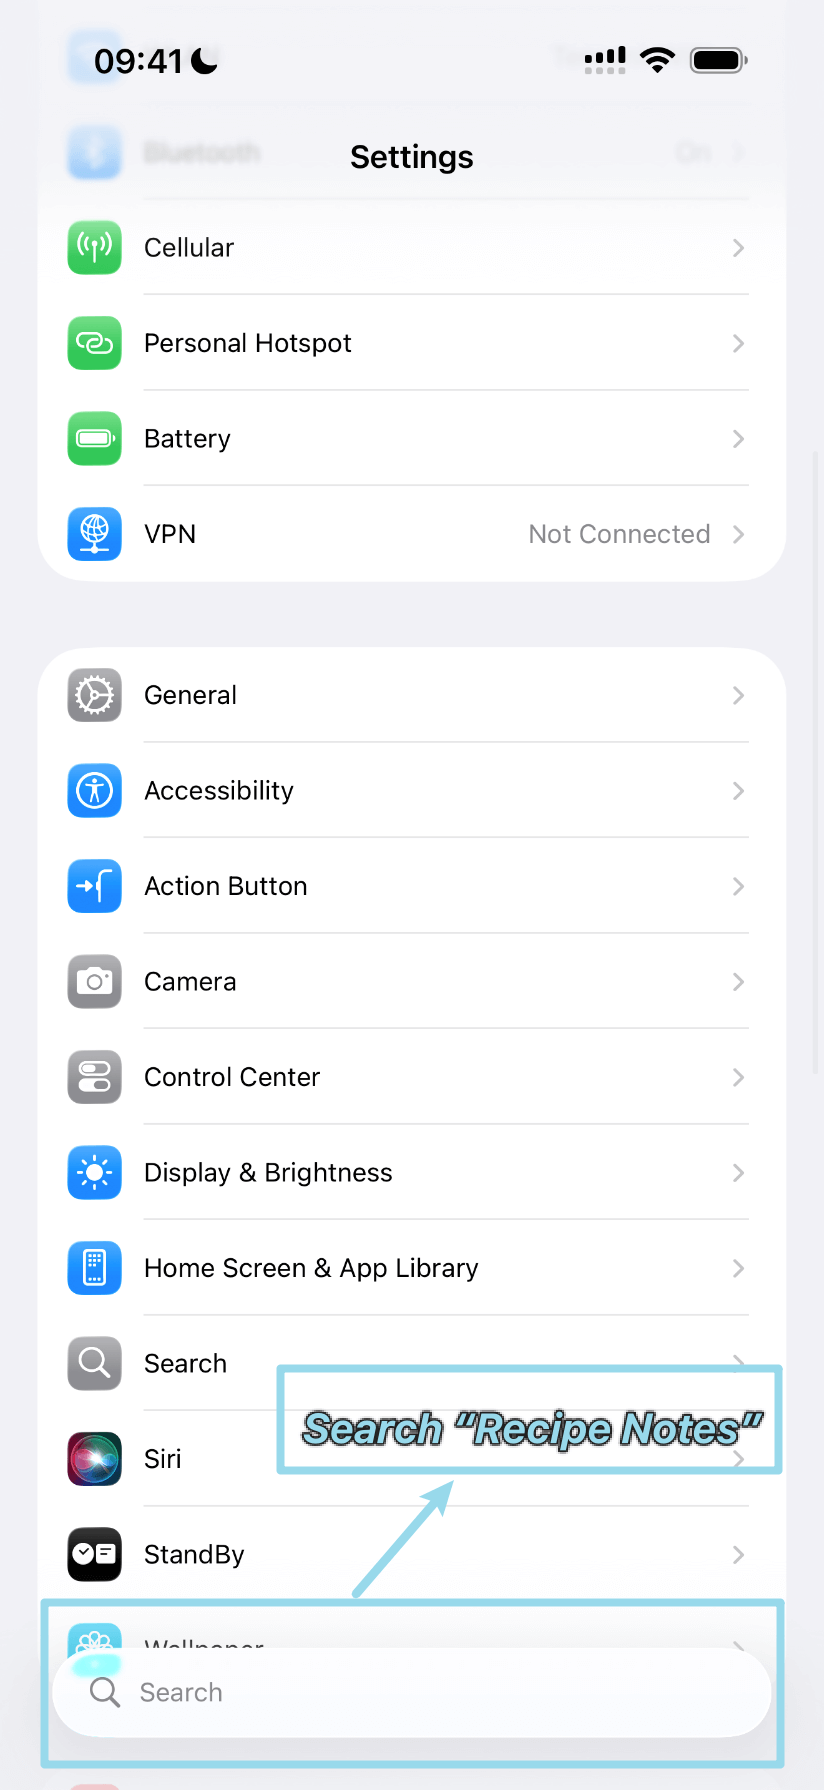
Step 1: Open iOS Settings
Open the iOS Settings app and use the search bar at the top to search for "Recipe Notes".
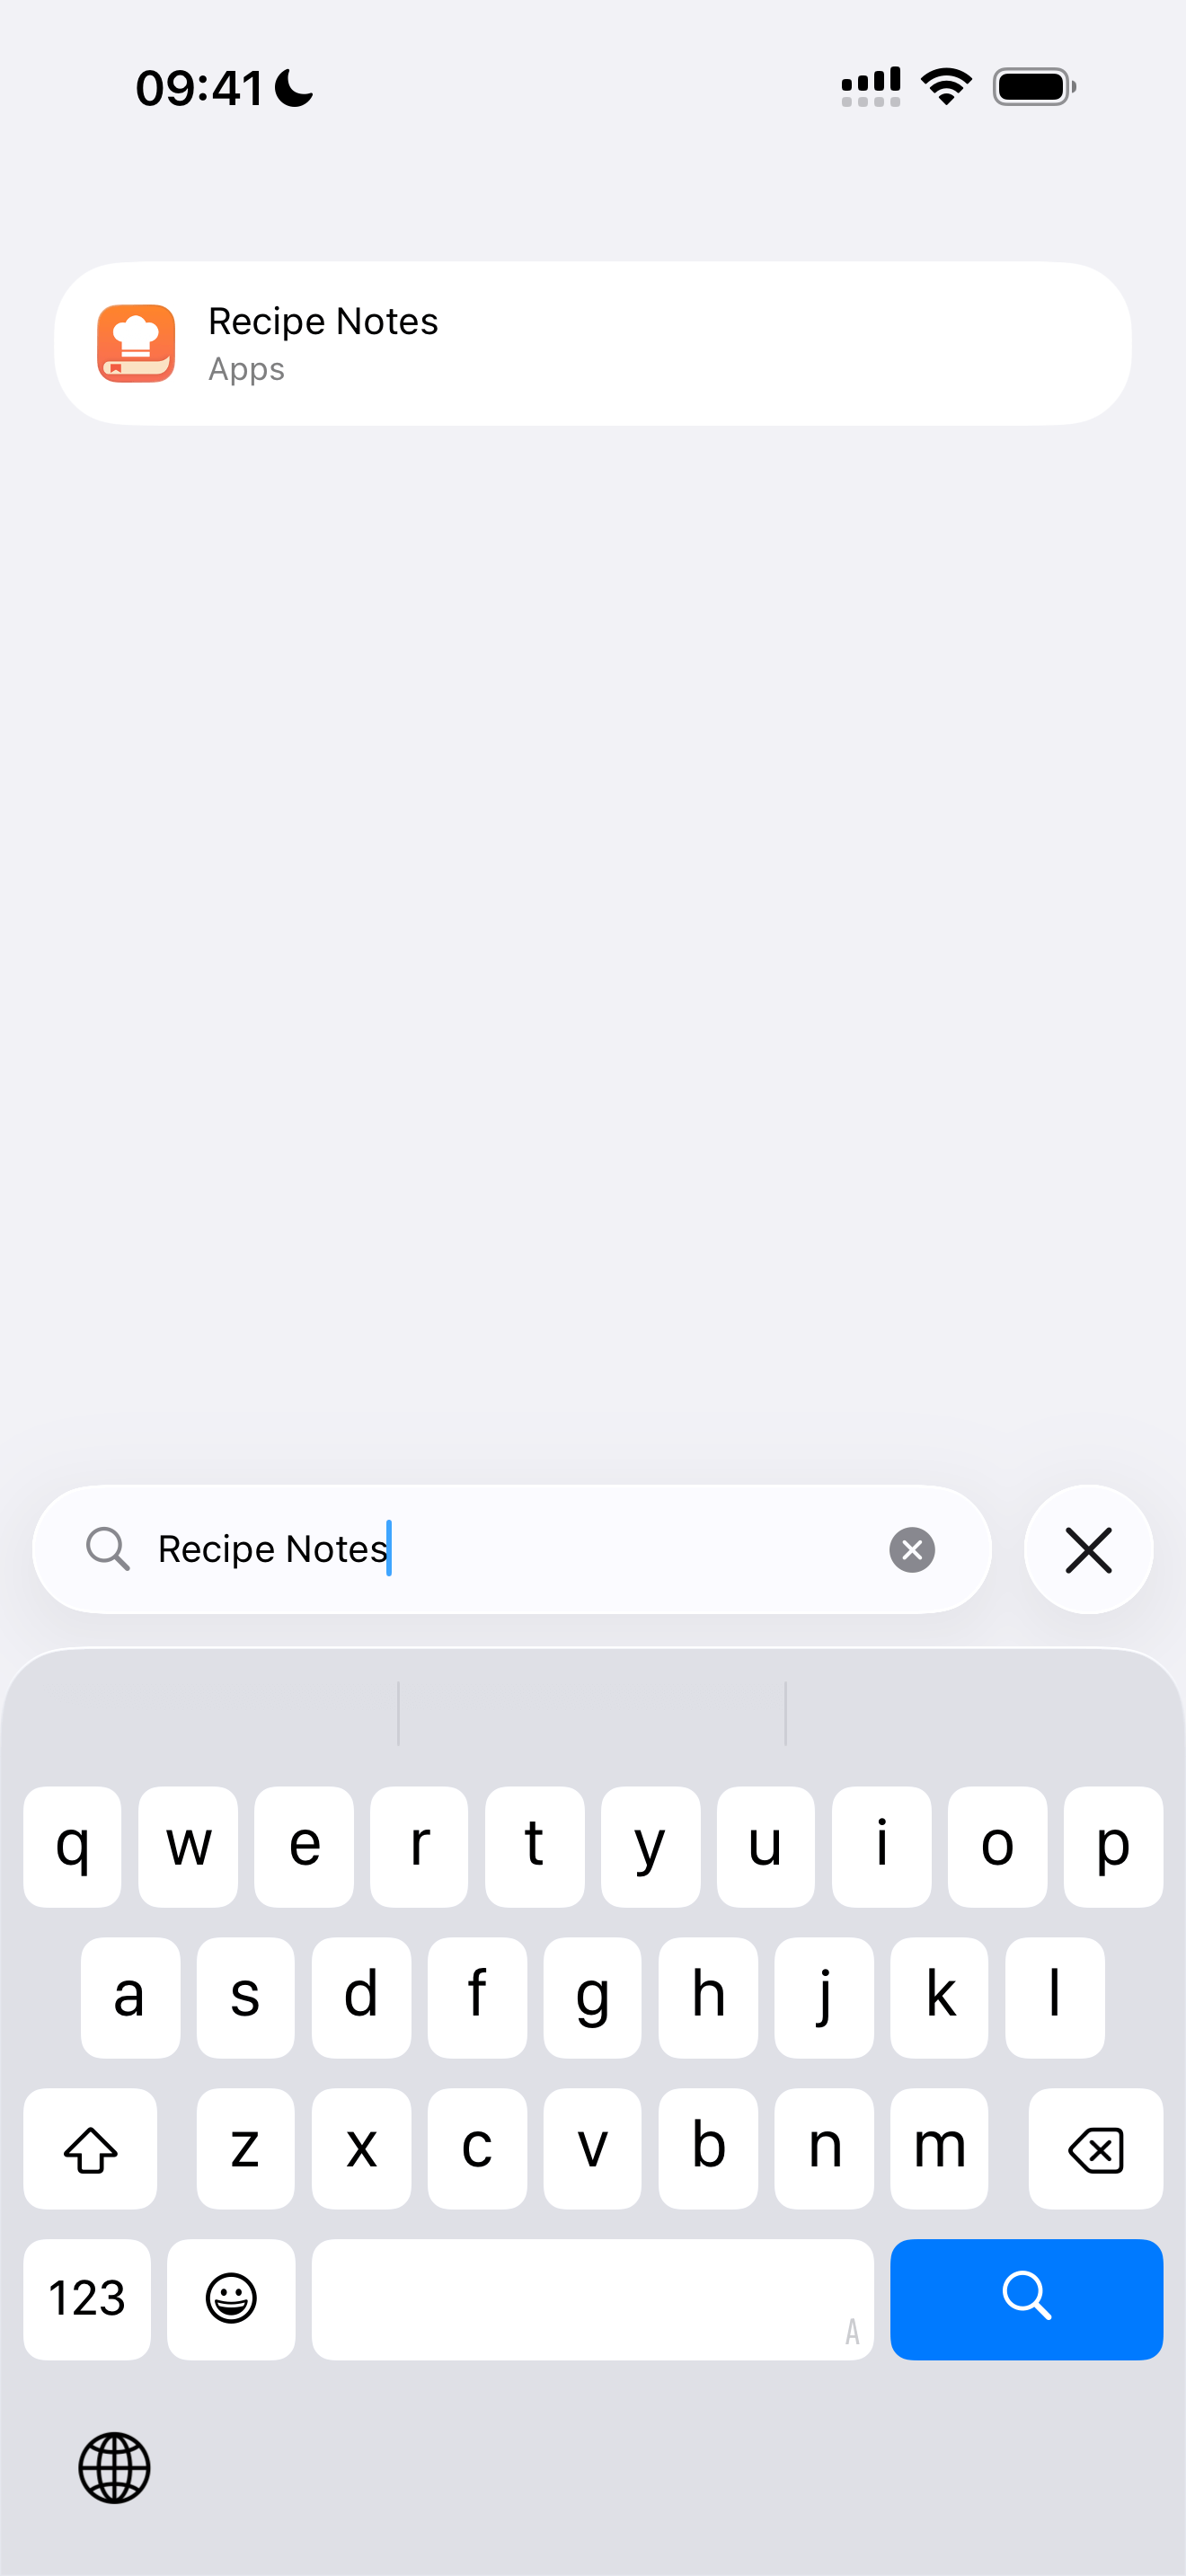
Step 2: Search for Recipe Notes
Type "Recipe Notes" in the search bar to find the app settings quickly.
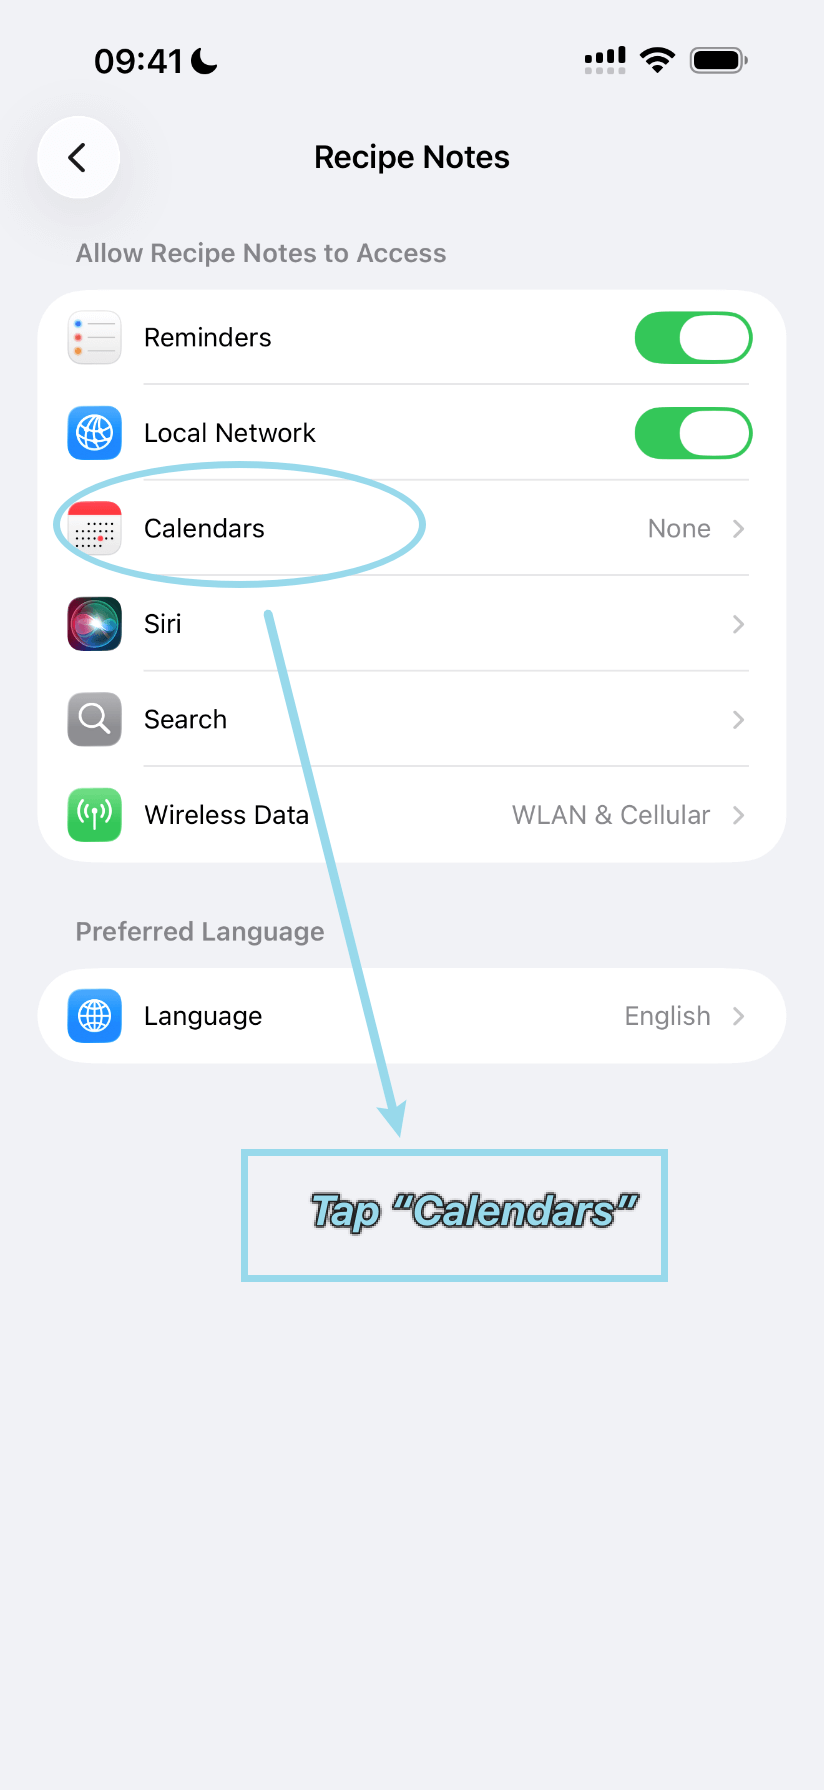
Step 3: Tap Calendars
In Recipe Notes settings, tap on "Calendars" to access calendar permission options.
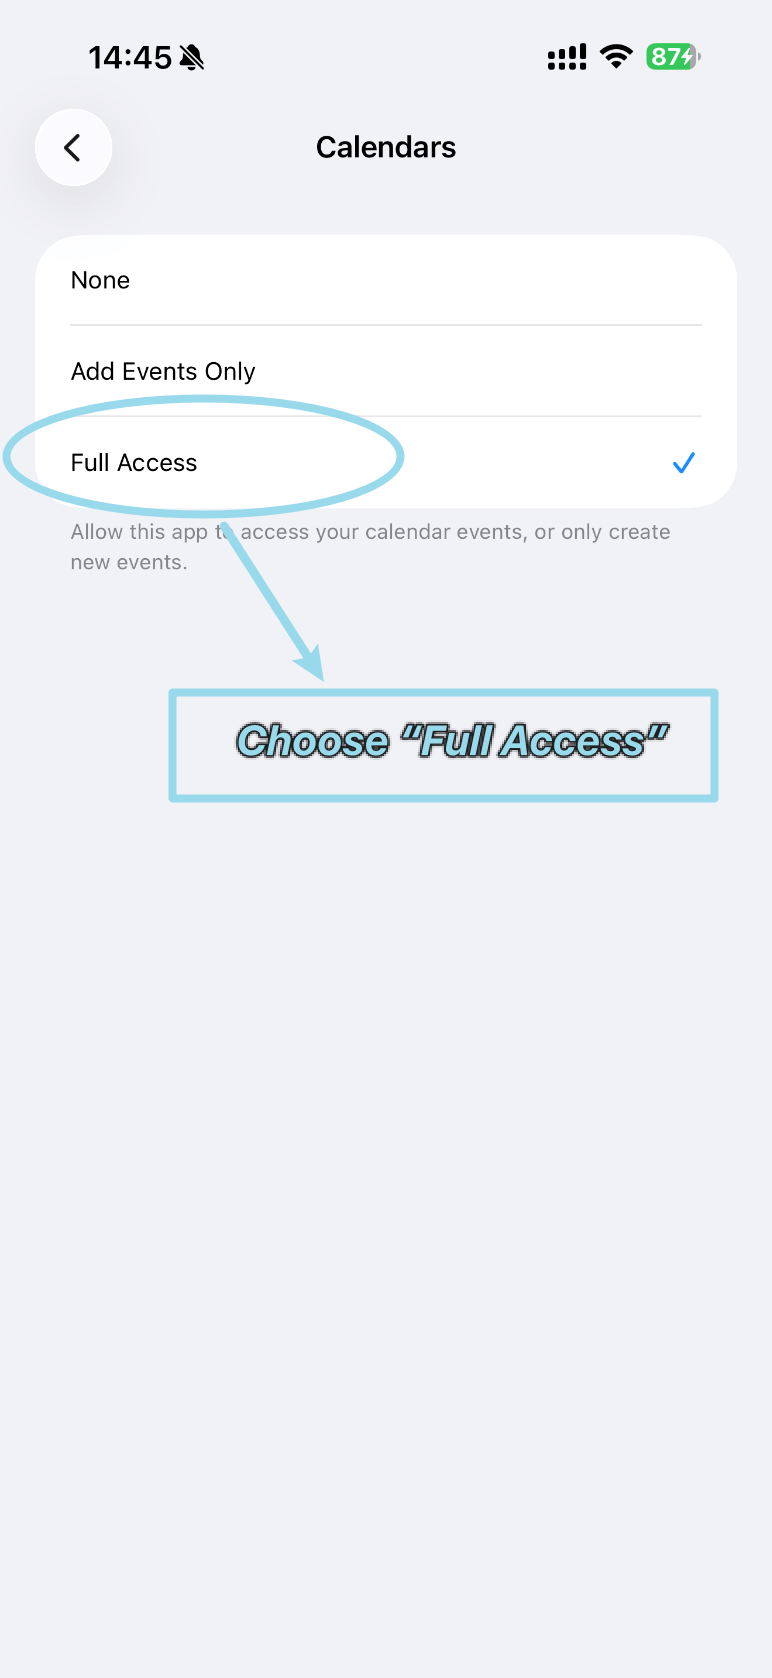
Step 4: Choose Full Access
Select "Full Access" from the available options to grant Recipe Notes complete calendar access.
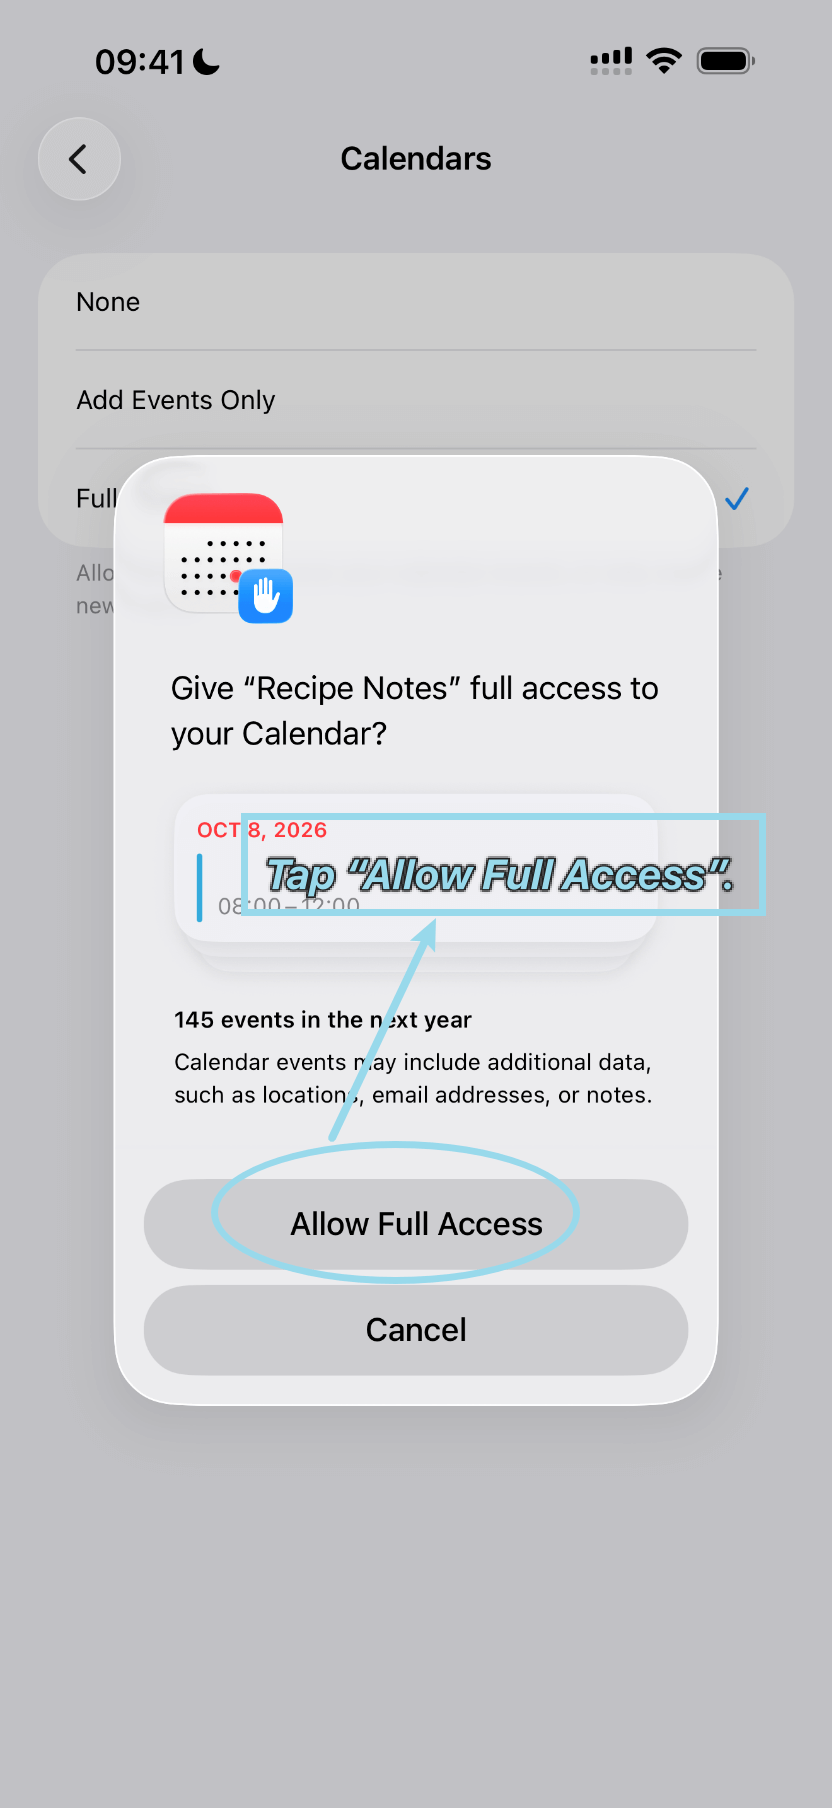
Step 5: Allow Full Access
When the permission dialog appears, tap "Allow Full Access" to confirm and complete the setup.
What Recipe Notes Adds to Your Calendar
Recipe Notes only adds and updates its own meal events. It does not change your other events. Once access is on, open Settings → Recipes & Planning → Meal Plan & Groceries in Recipe Notes and turn on Sync to Calendar.
- Every meal you plan appears as an event in a separate calendar named "Recipe Notes".
- The event title is the recipe name, with an icon for the meal: 🌅 breakfast, ☀️ lunch, 🌙 dinner, 🍪 snack.
- Breakfast starts at 8:00 AM, lunch at 12:30 PM, dinner at 6:30 PM, and snacks at 3:30 PM. You can change the breakfast, lunch, and dinner times under Meal Times on the same screen.
- Each event lasts one hour and has an alert 30 minutes before it starts.
- When you remove a meal from your plan, Recipe Notes removes its event too.
Troubleshooting
- "Calendars" is missing from the Recipe Notes settings page. In Recipe Notes, open Settings → Recipes & Planning → Meal Plan & Groceries and turn on Sync to Calendar once. iOS shows the setting only after the app asks for access.
- The events do not appear. In the Calendar app, tap Calendars and make sure "Recipe Notes" is checked.
- You want to stop syncing. Turn off Sync to Calendar in Recipe Notes, or set Calendars to "No Access" in iOS Settings.