
Cookbooks are the easiest way to keep your collection tidy. Create one for each meal type — Breakfast, Lunch, Dinner, Snacks — or organize by cuisine, diet, or occasion.
Step 1: Create a Cookbook
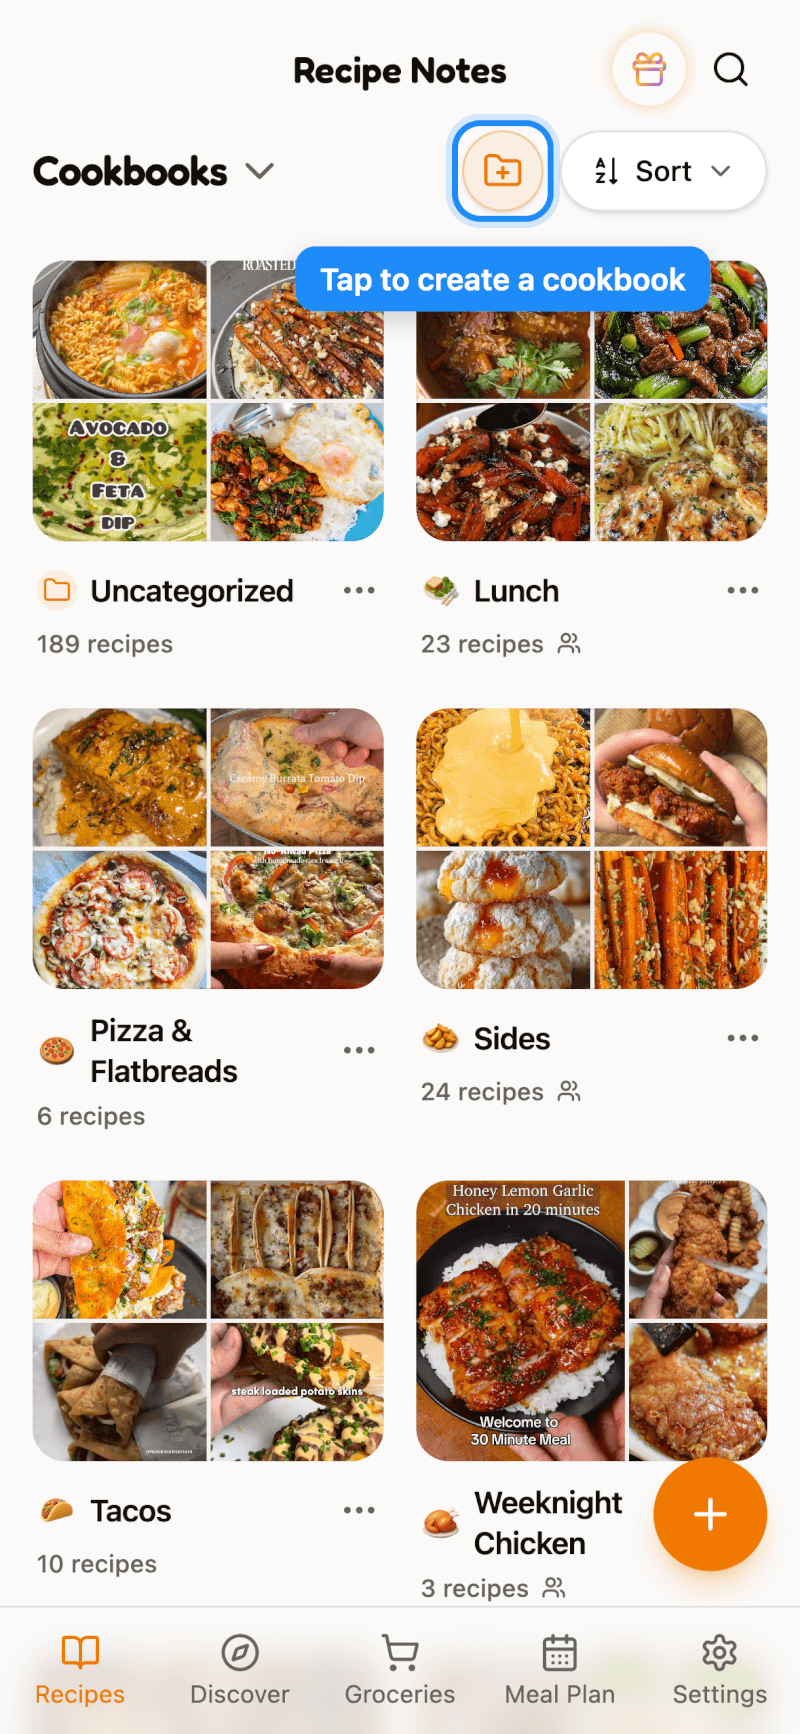
On the Cookbooks home screen, tap the New cookbook button (the folder icon with a plus) at the top. You can also tap the + card at the end of your cookbook grid.
Step 2: Name It and Choose an Icon
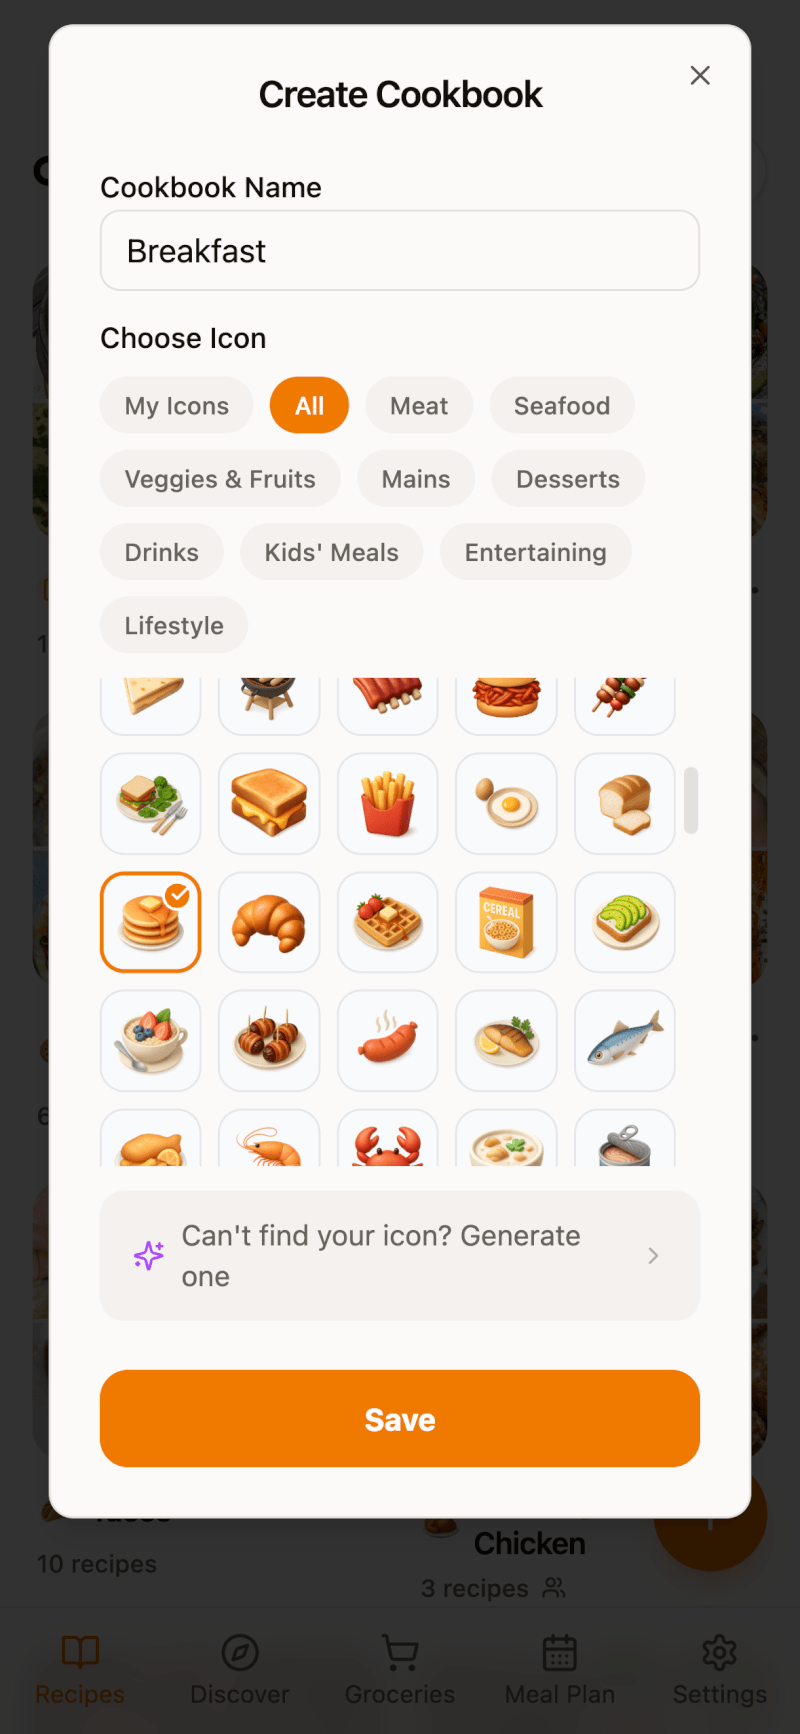
Give your cookbook a name, such as "Breakfast," then pick an icon. Use the category chips to narrow down the icon list. Can't find the right one? Pro members can tap Generate one to create a custom icon. Tap Save when you're done.
Step 3: Add a Recipe from Its Details Page
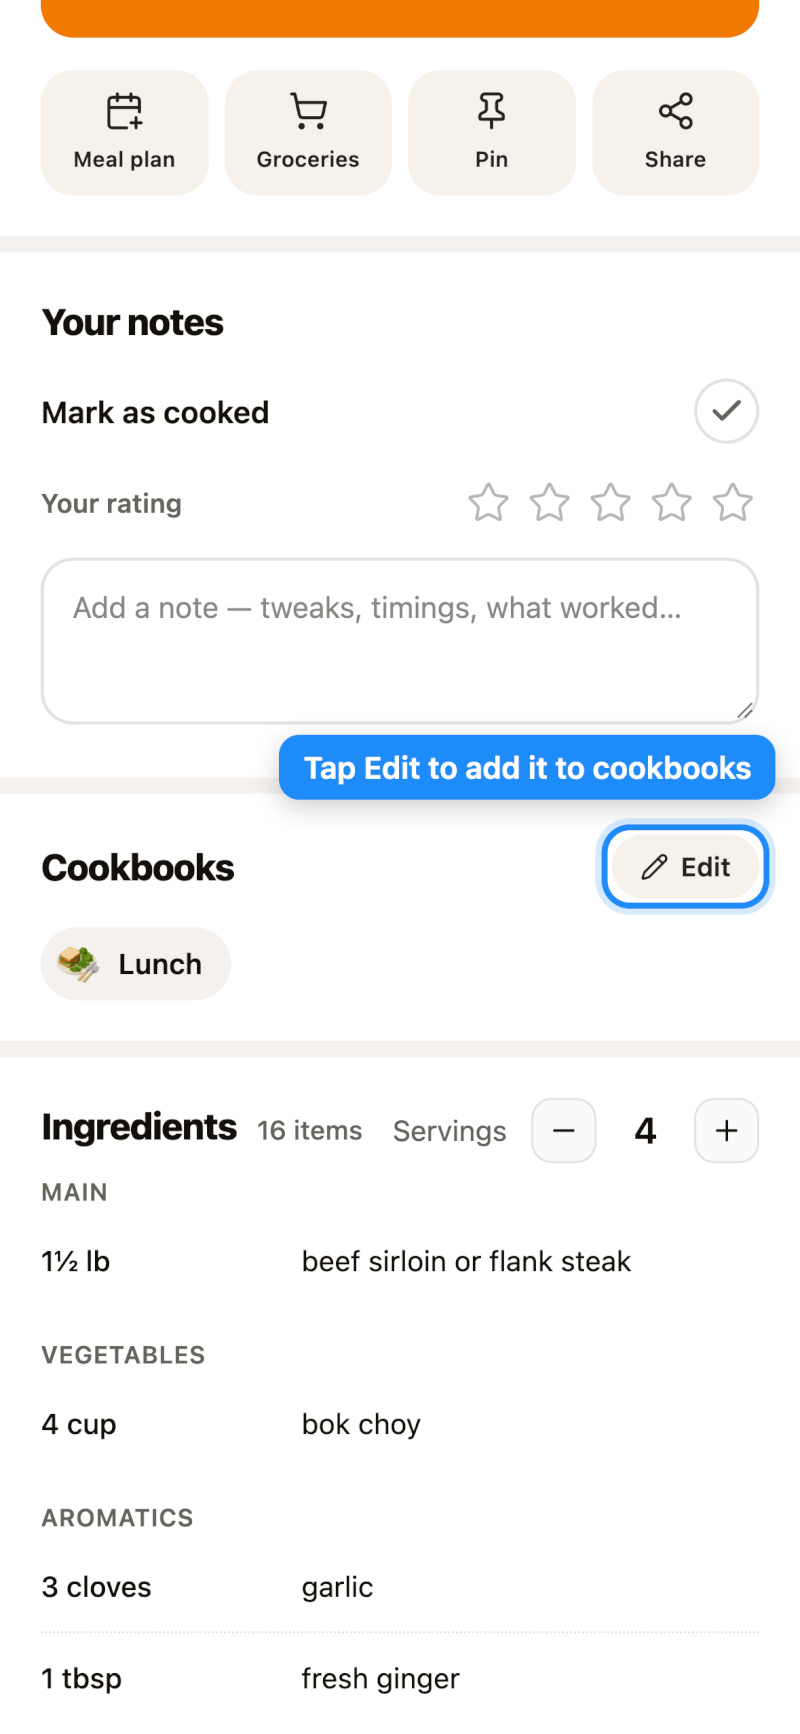
Open any recipe and scroll to the Cookbooks section, then tap Edit.
Step 4: Pick Your Cookbooks
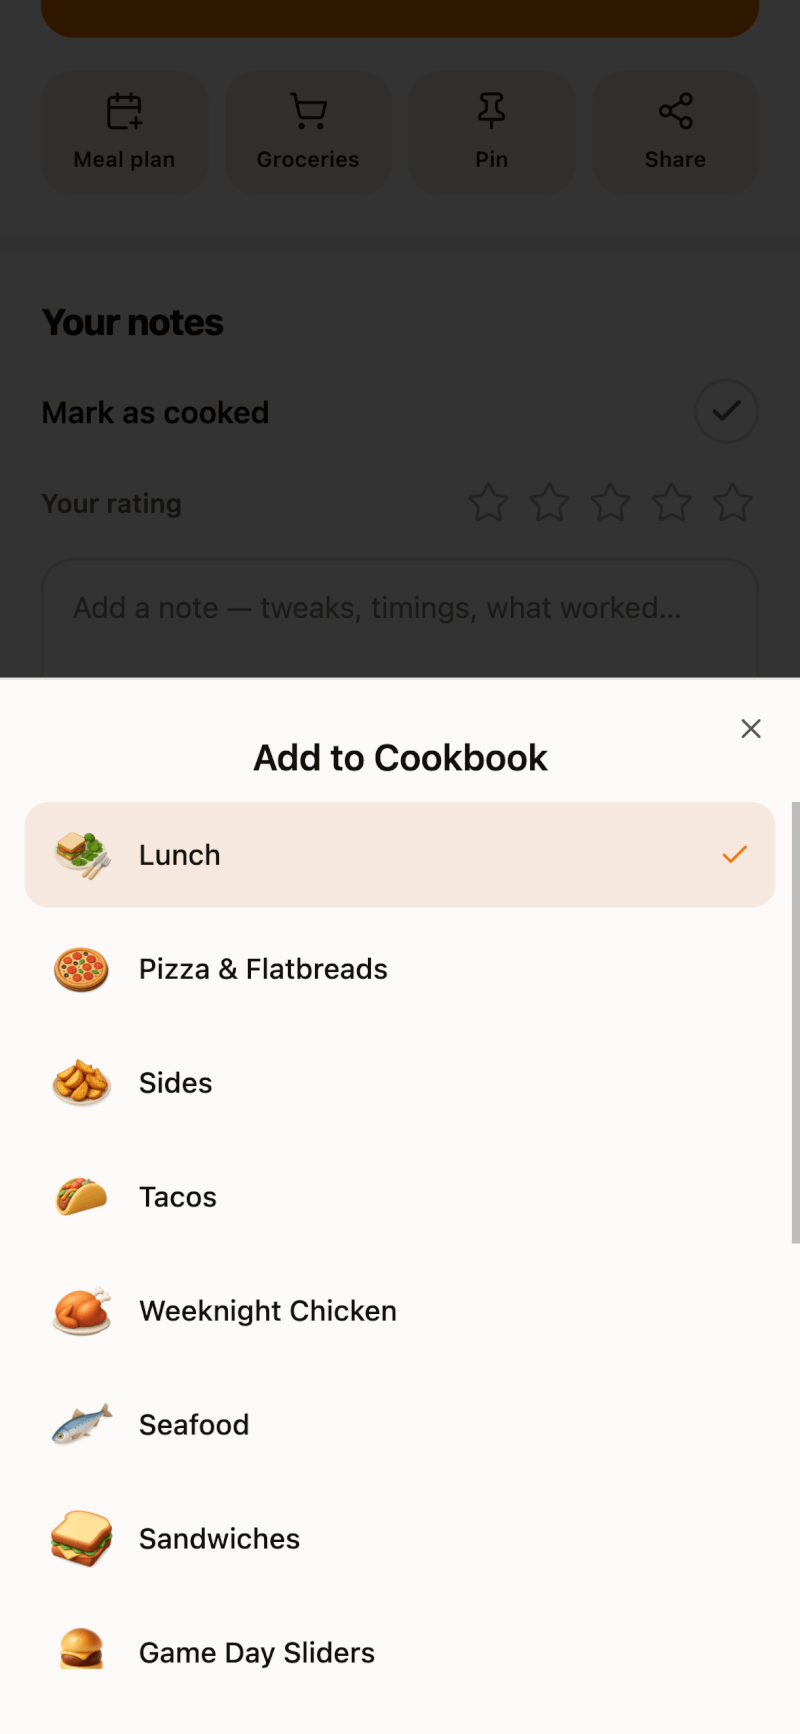
Tap each cookbook you want the recipe to appear in. A recipe can belong to as many cookbooks as you like.
Other ways to add recipes to a cookbook:
- On iPhone and iPad: long-press a recipe in any list and tap Add to Cookbook.
- Many recipes at once: use Select mode — see how to select multiple recipes.
- While importing: choose a cookbook before the recipe is saved — see how to save imports to a cookbook.
Step 5: Browse by Cookbook
Tap any cookbook on the home screen to see just its recipes. To jump to a different cookbook, tap the cookbook name at the top of the screen.
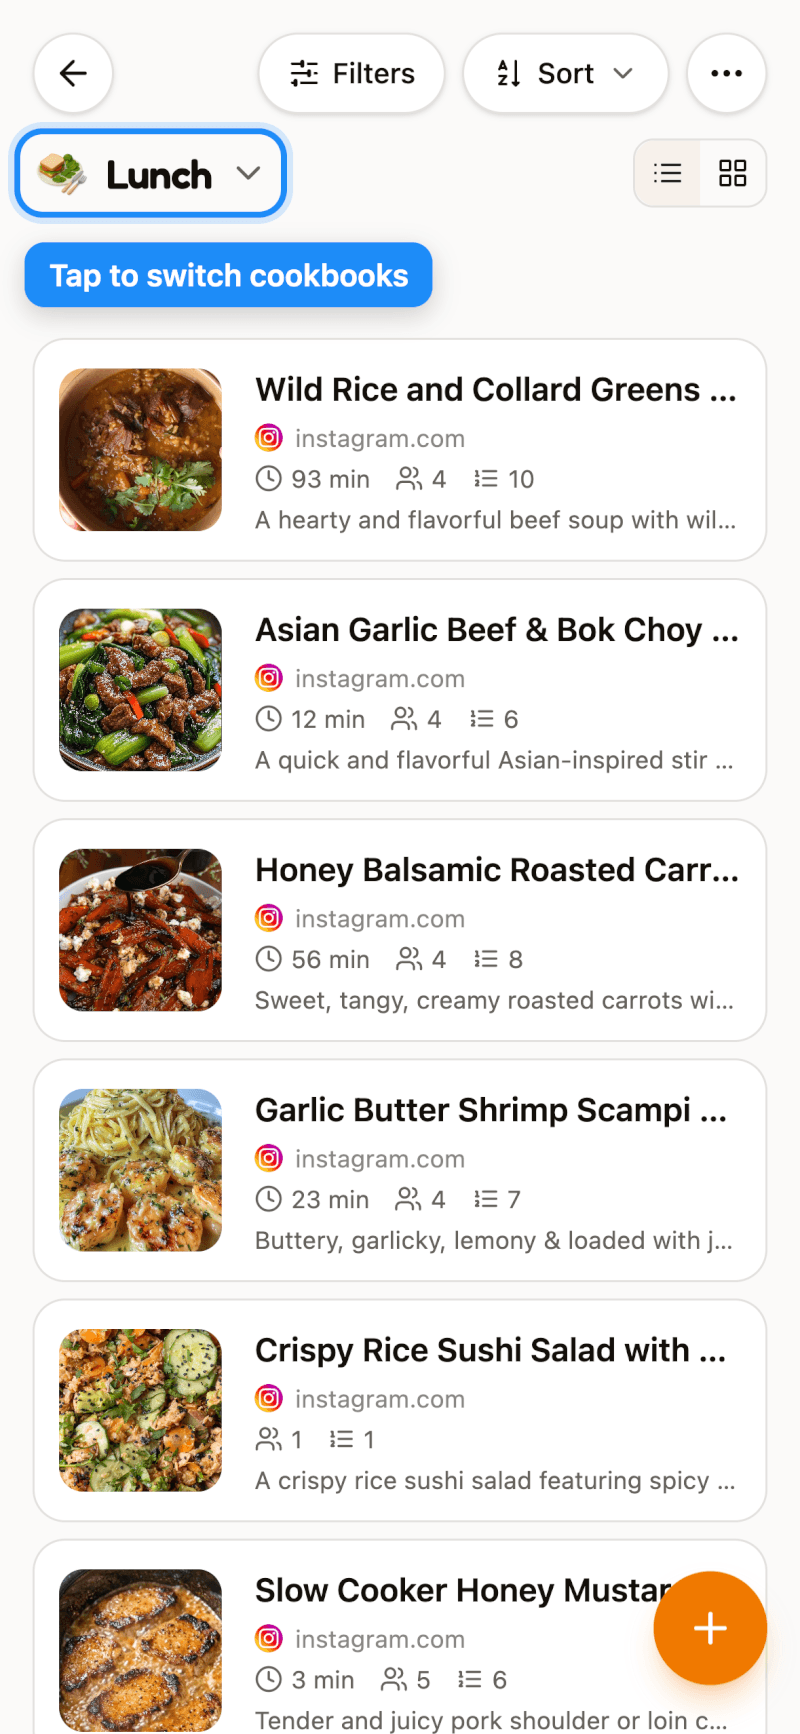
Recipes that aren't in any cookbook yet live in Uncategorized, so nothing ever gets lost.
Free plan note: the Free plan includes up to 2 cookbooks. Upgrade to Pro for unlimited cookbooks — see which plan is right for you.